How to make a Roast Turkey Cake
I was really intimidated to even do one of these!! But I finally got my nerve up to try it. I've seen so many awesome roast turkey cakes in the last few years and everyone said that they were easy to do...?!!! Really?!!! Um...well, you be the judge!! I took this cake to our Thanksgiving dinner and everyone was wondering why the turkey was on the dessert table!!! That was a great compliment!!!
So to get on with how I did mine:
I first made the wings and leg bones so that they had a little time to set up. I shaped some gumpaste into a basic wing shape.
Then I used a ball tool to give the wing some bone definition.
Then flattening out the edge to make it look more bony
.
For the leg bones, I put some gumpaste on a skewer, rolling to the length I wanted. I used a melon baller to round out the end of the bone. Cut the skewer to desired length also.
For the cake, I used two 12 inch round pans.
The first cut is the hardest!!! I traced a shape out with a knife before cutting. Set the two cut ends to the side and save for the legs.
Then round out the top corners and underside, until you get the shape desired.
Cut a half circle out of the pieces left of the cake to make the legs and put them on either side.
Pipe on the icing using a bag without a tip. Smooth with a spatula. Add the bones into the end of the legs. Let crust over and then smooth with a Viva paper towel, remembering to press in the underside of the turkey to give it a 3-D dimension. If you can find a paper towel with a dot pattern, use it now to give the turkey a skin-like appearance. I couldn't find a dot pattern paper towel so I used one of my plastic texture sheets that had a somewhat dot pattern. You can also use the plastic weaved bag from onions. I didn't have one so .....
At this stage of the of the cake, you can add shadow anywhere that's needed. It's probably easier if you have an air brush, but I don't have one!! I did take some black dust and put on the edges that would darken in the oven as if it here a real turkey. I used a fine mist spray bottle filled with warm water, corn syrup and brown food coloring. As you can see from the pictures, the spray would run down the side of the turkey. I guess it has that "basted" look!!
To finish, I put my turkey on a platter that was purchased at the Dollar Store! I know, I'm cheap!! I made lettuce out of fondant and veggies that where a fondant/gumpaste mix. I also put some coarse sugar sprinkles on to make it look like seasoning.
Here is a close up of the carrots, peas, sugared cranberries and yes those are supposed to be potatoes!! Some people thought they were eggs!!
Take any remaining cake scraps and cube them for the stuffing, filling the "cavity".
Below are some pictures of Jacque's turkey!!! She did such an awesome job that I have to show it off!!! i love hers!!! I will let her tell you how she did hers!!
******************************
Rhonda, That was a fabulous step by step!! Thank you!
I am not sure I can add much to that, but I did a couple of things differently and give credit for some of the techniques to the very talented Cece Gardon, who demonstrated her roast turkey cake for the
SouthEast Texas Cake Club last November.
I wish I been given the luxury of time to take "in process" pics, but it was a crazy busy week.
First, I baked mine in 3 oval pans along with two cupcakes. I stacked the ovals and sculpted it ( making the first cuts can be very intimidating!), sloping down toward the front and sides, then carved into a modified V shape in the back.
For the drumsticks, I stuffed two waffle cones approximately halfway with Rice Crispy treats. Then the cupcakes were placed in the top to round out the drumstick, and the shaped fondant for the leg bone was attached to the pointed end of the cone. I crumb coated the legs with buttercream.
I then filled and crumb coated the entire turkey body, attached the drumsticks with skewer into the body of the turkey; and covered it all with fondant, using the texturing techniques described by Rhonda . Then the wings, as created above, were positioned into place.
With the leftover cake scraps, I cut 1/2" cubes, toasted them, and mixed with vanilla custard.
The custard will help adhere the cubes to each other and to the cake.
The lettuce, cranberries and oranges were created from chocolate clay.
Using an airbrush, the turkey, fruit and veggies were colored for more texture and effect.
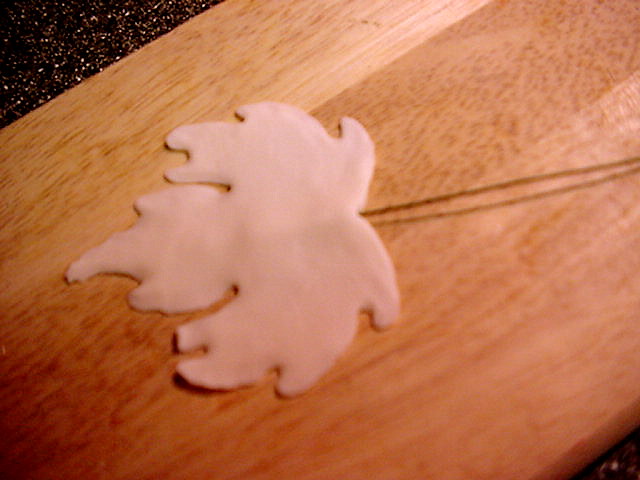
Notice that for my "platter", I used
Mame's Autumn leaf tutorial to create leaves and placed them on a oval cake board, lightly dusted randomly with gold luster dust to give the appearance of a porcelain platter.
Photos by Rhonda Christensen and Jacque Benson
All Rights Reserved- 2009
This material may not be republished or reproduced in any manner without the expressed permission of the author.


 Let cool completely before removing from the pan
 Cut into small squares and wrap in wax paper or decorative foils that you can buy at a cake or candy shop


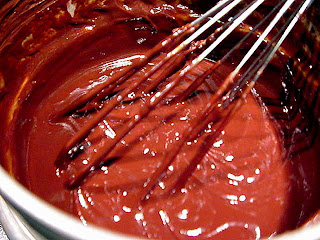 Gradually pour the cream into the melted chocolate . Then slowly whisk until smooth and homogenous.
 Divide the chocolate into two separate bowls. and add 1 tablespoon of chilled butter and Grand Marnier (2T) in one bowl, 1 T of chilled butter and Chambord(2T) to the other. Mix until fully incorporated.
  Cover with plastic wrap and place in refrigerator to chill until ganache holds its shape. Or you can make the ganache at the end of the day and let it cool overnight. As it cools, it will thicken and set.


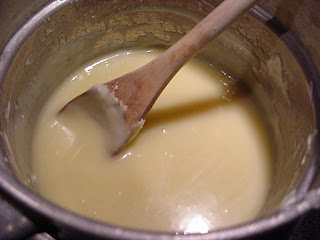 Whisk mixture slowly until smooth and homogenous. Stir in the butter and the flavorings until fully incorporated; then stir in minced preserved ginger. Pour into bowl, cover with plastic wrap and chill until the ganache holds its shape, then scoop out balls with melon baller, placing on wax paper, then chill.
 When cold, roll quickly between the palms of clean hands to form into perfect balls of ganache. Chill until ready to coat with chocolate.
 Hold the fork over the bowl for several seconds to allow the excess chocolate to drip back into the pan, then place the truffle on wax paper swirling the extra chocolate over the top of the truffle to finish off. Garnish the top of the Amaretto Ginger Truffles with small pieces of candied ginger.


 Bring to a boil and continue to cook for 5 minutes
 Remove from heat and stir in vanilla, caramel flavoured LorAnn Oil and baking soda.