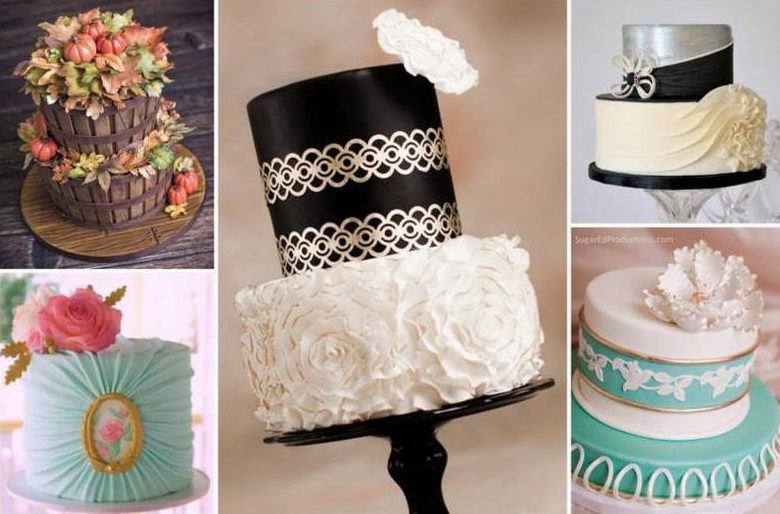
VINTAGE LUGGAGE CAKES
Ingredients :
Three 9"x 13" cakes
Non crusting chocolate icing
4 Lbs. dark chocolate fondant
Divided- reserving 1 lb
1 ½ Lbs. ivory fondant
½ cup gumpaste
Silver Luster Dust
Gold Luster Dust
Lemon Extract or grain alcohol;
Melted milk chocolate;
1 lb white fondant, divided and colored for clothing
2 large marshmallows
Tools needed:
fondant roller and mat
1- 8 ¾” X 6 ½” box , covered with wax paper & dusted with cocoa
PME wheel cutter ( or Pizza cutter)
Ball tool
Wilton Alphabet/Number cutters
3/8 “ round cutter & #6 piping tip
Gum Glue
Paintbrushes
Pattern tracing tool
Contact paper
1/4" Foam Core
X-acto knife
16" sqaure cake drum
Spatulas
4- ¼:” dowels -4” length
2- ¼” dowels- 5” length
1-1/2" dowel- 6-7" in length,
sharpened at both ends
The top luggage lid is separate, propped up using wooden dowels. It must be
Completely dried and hardened. So it is imperative that the lid, as well as
hardward it be made ahead of time.
I recommend at least 4 days drying time for the lid, more time may be
necessary if the humidity is high.
TOP LID
1. Knead together 3 lbs chocolate fondant with 1 ½ lbs Ivory fondant until color is fully blended. Cut off a small portion, and wrap the rest tightly and set aside.
2. Roll out a 9x11 rectangle approximately 3/16” thick;
Lay over prepared box covered with wax paper.
Measure ½” down from the top edge of the box; and using a pizza cutter,
cut the edge of the lid . Smooth top of lid with a fondant smoother. Set aside to dry.
3. When firm, carefully lift from box and invert to dry bottom of lid.
When completely dry, take the pattern tracing tool and run a “topstitching” line around the bottom edge of the lid.
4. Cut four Patches from dark chocolate fondant and attach to each edge of the lid using Gum glue. Trace a stitching line around the edge of each patch.
5.* Cut 2 separate ½” strips of dark chocolate fondant about 8” long, rounding the front
end. Trace the “topstitching” line around each strip and punch three belt holes at
the front end of the strip using the small end of the#6 piping tip.
6. Glue each strip to the top of the lid, allowing the hang over the front. Fasten silver lock on center front with Gum glue.
*Handy tip-let the straps on this lid be your last step on the entire cake. Then your strips will still be flexible when placed atop the cake, avoiding breakage.
HARDWARE:
1. Roll out a small amount of firm gumpaste about 1/16
th “thick. Cut out 2 lock plates using patterns.
Using the letter “I” Wilton cutter, punch out a slot in the smaller plate.
Roll a small amount of gumpaste ¼” thick, and cut two 3/8”circle. Press each round, flattening slightly and using your cutter, make an impression to form an outer ring. Then press a vertical line just to the center, forming a keyhole.
Glue the keyhole to the right side of the plate using gum glue.
2. Cut 4 buckles using the “D” stretching the inner cutout and rolling the straight edge only, leaving the curved side flat.
3. Cut 4 d-rings using the “0”number cutter, stretching the opening slightly and rolling all the edges. Crimp and straighten one edge to make one side flat.
Cut 4 buckle tongues, using the “I”, flattening and curving one side, and rolling the other.
4. Take a ball of gum paste (malt ball size) and shape into a lock by elongating one side and smoothing with a ball tool to shape. Press a line across the top to define the lock. Set aside to dry completely.
5. Mix the luster dust with alcohol and paint the lock and plates silver, and the buckles and d-rings gold.
6. For Handles, cut 2 separate 5/8” strips of dark chocolate fondant about 4 inches long. Fold over and Trace stitching line along the edge and insert end through finished d-rings and glue on underside.
The night before assembling cake--- From the blended chocolate fondant,roll out and cut two 4 X 13” rectangles, four 4X 9” rectangles, one 9X13” rectangle, two thin ¾”X 9” strips, two thin ¾” X 13” strips, and two 4X 6 ½” rectangles.
It is best to make these a bit larger than needed, then cut exactly to fit the iced cake as you apply them.
Allow to firm up overnight. This makes the sides easier to apply to the cake.
ASSEMBLING THE CAKE
1. Cut a 9x13 cake board from ¼” foam core. Cut 9x 6 ½” ”cake board from ¼” foam core. Cut the boards to fit your cake exactly.
Cover with contact paper.
Using a ½” sized dowel, make a hole in the center of the 9x6 ½” board.
2. Stack and Fill two 9x13x2” cake layers. Cut the third 9x13” layer in half to form a 6 ½” x 9” two layer cake. Stack and fill.
3. Ice the bottom cake with non-crusting buttercream icing.
4. Measure your cake carefully and re-cut the edges of the precut fondant rectangles to fit your cake.
Measure twice, cut once.
Trace a stitching line around the bottom and sides rectangles. Place along back, then the sides of the cake matching the corners. Attach front last.
5. Run a line of melted chocolate along the corners and smooth with a spatula.
Re-measure and cut the thin strips and glue them along the upper edge of the cake with melted chocolate.
6. Attach the thin strips along the top edge of bottom tier using melted chocolate, creating the sides of the lid.
7. Cut a 6- ½”x 9” pattern from waxed paper.
8. Before applying the fondant lid, measure the top of cake. Re-measure and re-cut the large 9X13”fondant rectangle to fit top exactly.
Lay waxed paper pattern on top and faintly mark the position of the cake. Punch out a ½” hole in the middle for the center dowel, and 4 ¼” holes to allow for inserting cake supports.
>
9. Lay on top of cake and spackle edges and corners with the melted chocolate.
10. Decorate the bottom tier before placing the second tier on top—
Cut 8 corner patches, tracing the stitching line on each outer edge.
Cut 2 leather straps for the base cake about 15” by 5/8”, and 2 straps 2 ½ ” X 5/8”. Punch holes with the #6 tip and trace the stitching on the 15” strap.
Cut a small opening in the smaller strap for the tongue of the buckle and wrap it around the buckle. Pull the end of the upper strap through the buckle and glue to the cake, cutting any overage at the base of the cake. Place the tongue on the buckle, attaching with gum glue.
11. Hammer the ½” dowel through the center hole, and insert the 4 inch-¼” dowels in the surrounding holes.
12. Align the bottom hole of the cardboard divider with the center dowel and stack the smaller cake on top, using wax paper to protect the bottom cake. Ice the cake with buttercream.
13. Lay a layer of while fondant over the top of the cake before applying the side panels.
14. Prepare and place panels on the sides, following the same procedure, as in steps 4 and 5.
15. After the corners are spackled, remove wax paper & cut and prepare 2 separate 2” straps just as before with buckle and tongue. Attach to front of the cake, using gum glue. Cut two more 4” straps, attaching to back of the cake.
16.Fasten the locks and plates to both cakes with gum glue.
17. Cut 4 handle holders (triangles). Insert the small end through the d-rings on the
handles and glue to underside.
18. Fasten Handles to both cakes with gum glue. Prop up and allow
to dry.
19. Insert two 6 inch ¼” dowels one inch inside front corner. Cover each with a
large marshmallow.
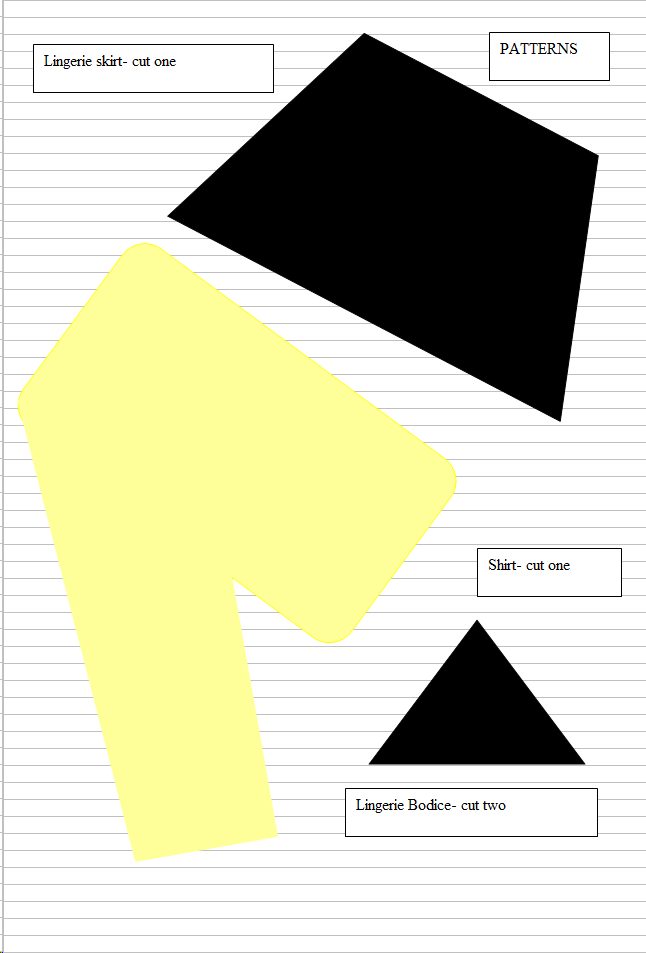
CLOTHING
- Roll out several different colored fondants into 6 inch squares. Texture and fold; Lay on top of cake.
- Roll out white fondant and cut with shirt pattern, then trace stitching line on shirt cuff. Cut 2 small circles for buttons. With toothpick, make 2 holes in center, then dust with pearl dust. Glue to cuff. Place immediately on left side of cake, falling over side.
- Roll out and cut chocolate fondant, texture or stencil. Glue the three pieces together with gum glue and attach a white fondant ribbon to cover the seam. Make a thin 3 inch roll from white fondant for the straps. Attach one edge with gum glue and tuck the free edge under. Arrange over left side of cake.
FINISHING TOUCHES
Place lid on top of cake, resting on back edge and front dowels. Brush cocoa powder
randomly over surface of cake to give a scuffed and weathered appearance.;
Jacque Benson . all rights reserved . 2007
This material may not be republished or reproduced in any manner without the expressed permission of the author.