This week's tutorial is on frill cutters.
These are such versatile cutters...the sky really is the limit with what you can do with them. There are so many combinations of layering and using cutouts, that can give you so many beautiful looks. I do show some these techniques on my
FUN WITH FONDANT FRILLS DVD
How to use frill cutters:

Step 1: (Sorry about the not so clear picture above).
I roll my paste through the pasta roller. If you don't have a pasta roller, I highly recommend getting one. They make sugar art so much easier. I especially love the attachment that goes on my Kitchen Aid mixer.
I love using the multi-ribbon cutter when I use these cutters. This little wonder will adjust easily to make a number of different width bands. Then you have a quick, straight line to work from when placing your cutters. Roll the tool along your paste to make the desired band width.
I also use this tool to make all my side ribbons for cakes, works great!
Here's a link to this tool:
MULTI-RIBBON CUTTER

Step 2: Take your frill cutter and match a straight edge of it against the straight edge of your paste. Be sure to dust the bottom of the paste and I usually lightly dust the top as well.
Just go along the whole length of the paste, after cutting one of the cutters, just match up the end and continue going down the paste. Now you can either disgard the bottom part or choose to use it to layer one design on top of the other.
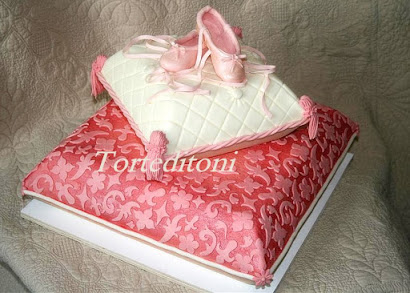
( See the BloomNet picture below, that has some nice examples of layering.)
Just go along the whole length of the paste, after cutting one of the cutters, just match up the end and continue going down the paste. Now you can either disgard the bottom part or choose to use it to layer one design on top of the other.
( See the BloomNet picture below, that has some nice examples of layering.)

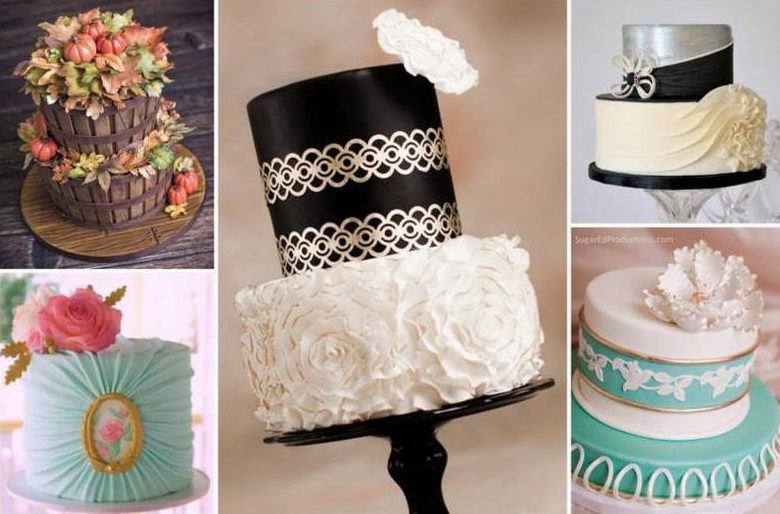
Step 3: Paste is all cut. Now you can apply to your cake like this, or if you choose, you can make some little cutouts in it. You can get so many different looks to these simply by applying them in layers and using different things to make cutouts.
See below the drastic difference in the same piece when you make some cutouts in it.
See below the drastic difference in the same piece when you make some cutouts in it.

Step 4: I used some round tips to cutout holes and the PME eyelet cutters worked great for the pretty little teardrop shape.
Here's a link to that set:
PME EYELET CUTTERS
Here's a link to that set:
PME EYELET CUTTERS

Here's a pretty spring cake I applied those frill cutter strips to. The birds are hand modeled and the pansies are piped.
They really are easy to pipe and so pretty on a cake.
Thinking spring ..... :-)
They really are easy to pipe and so pretty on a cake.
Thinking spring ..... :-)

Aren't these little mini cakes pretty?
All done with frill cutters.
We carry three sets on our site....here are some links to them.
They run $7.00 per set.
The above cakes were created by me for the BloomNet Floral book. It was such an honor to be a part of that!
Click to order:
FRILL CUTTERS SET 1
All done with frill cutters.
We carry three sets on our site....here are some links to them.
They run $7.00 per set.
The above cakes were created by me for the BloomNet Floral book. It was such an honor to be a part of that!
Click to order:
FRILL CUTTERS SET 1
FRILL CUTTERS SET 2
FRILL CUTTERS SET 3
This tutorial was written by Jennifer Dontz. All Rights Reserved 2010
This material may not be reproduced without permission from the author.
FRILL CUTTERS SET 3
This tutorial was written by Jennifer Dontz. All Rights Reserved 2010
This material may not be reproduced without permission from the author.